Oh my! I may be completely addicted to making these cute little bags. I had seen them awhile back, and hadn't gotten around to buying the paper sacks until yesterday. I just LOVE how they turned out, and you could totally use them for any occasion. As a little thank you gift, favors for a party, place markers at a table, the ideas are endless! Be looking for me to make more of these down the road. A fantastic way to show off the designer paper too!!!
The sentiment on this one "too cute" is perfect for this little tote! And the polka-dots make me smile!

Recipe:
Stamp Set: Sweet Celebrations
Ink: Baja Breeze
Paper: Urban Oasis DSP, Kiwi Kiss, Going Gray, Whisper White
Accessories: Big Shot Top Note Die, Word Window Punch, Scallop Circle Punch, 1 3/8" Circle Punch, 1 1/4" Circle Punch, Dimensionals, Baja Breeze Ribbon
This second one I used my new Cute and Curly Bundle, which is AWESOME! You get 4 stamps that go along with this adorable punch! To get the Chocolate layer, I just adhered the punched out sentiment to the Chocolate and cut around it!

Here is a side view of the bag - you can see the paper bag inside that I am using as my base. I got them at Michael (in the wrapping paper section). They are 3 1/2" x 2" x 6 3/4" and I cut off the top of the bag, measuring from the bottom at 2 3/4".

Recipe:
Stamp Set: Cute and Curly
Ink: Chocolate Chip
Paper: Sweet Always DSP, Chocolate Chip, Whisper White
Accessories: Big Shot Top Note Die, Word Window Punch, Chocolate Chip Ribbon, Dimensionals, Curly Punch
I hope you like these! I hope to spend a bunch of time creating today and this week - I have been a slacker lately! Too much going on! Hope everyone has a great Memorial Day - thanks for stopping by!

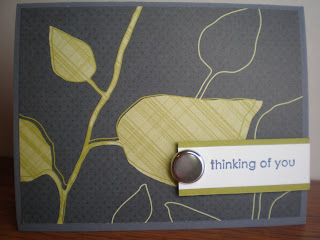 Very generic greeting, which is nice for those times that you don't really have a reason to send a card and want to - or - a great card to have 'on hand' for those times you need a card in a hurry! The extra large brad is also super fun!
 The sentiment is actually 2 stamps, so you could put whatever you wanted inside that cute little curly shape! Sorry ladies, no punch for this one! Hand-cutting (my fav!!)