I am involved in a monthly demonstrator swap, and here are the swaps I did this month. We are supposed to be meeting tonight in RED LODGE, and with the winter weather advisory, I'm not going. Good thing I sent my swaps ahead of time.
The first swap was to do a card that used our favorite new stamp set. I knew right away that I wanted to use Fifth Avenue Floral stamp set. The first card that did turned out a little too much like the 4th of July...what do you think?

The top layer of the card is a piece of transparency paper. Remember the overhead projector that teachers used when we were kids? Same stuff! Stamp on it with
Stayz-on and that ink isn't going anywhere!

Card Recipe:
Stamp Set: Fifth Avenue Floral
Ink: Real Red, Pacific Point, Basic Gray, Black Stayz-on
Cardstock: Pacific Point, Basic Black, Whisper White
Accessories: Transparency Paper, Real Red Ribbon, Corner Rounder Punch
This is the card I ended up swapping with...colors are a little softer and not so like fireworks! A little like Valentine's, but who doesn't love pink and red together?

Card Recipe:
Stamp Set: Fifth Avenue Floral
Ink: Basic Black, Pink Pirouette, Riding Hood Red, Black Stayz-on
Cardstock: Riding Hood Red, Basic Black, Very Vanilla
Accessories: Transparency Paper, Riding Hood Red Taffeta Ribbon, Corner Rounder Punch
The second swap was a little more difficult to wrap my head around. We were supposed to do a "punch art" swap, either a card or 3-d. In other words, create an image only using the Stampin' Up! punches...I searched and searched the internet for ideas. I don't think my brain works quite like that, and even the samples that I found were a little too "cartoonish". I love flowers, and this is what I came up with using 3 different layers of the scallop circle punch. I used my scissors and snipped every other scallop almost to the center to make the petal. Do a little sponging around the edges to give it some depth, and layer it up.

Card Recipe:
Stamp Set: Family Phrases
Ink: Regal Rose
Cardstock: Regal Rose, Whisper White, Certainly Celery, Old Olive, So Saffron
Accessories: Dimensionals
Punches: Scallop Circle Punch, 1/2" Circle Punch, Horizontal Slot Punch, Word Window Punch, 1" Circle Punch, Scallop Edge Punch
Thanks for stopping by! Sorry I have been missing for so long....long week!


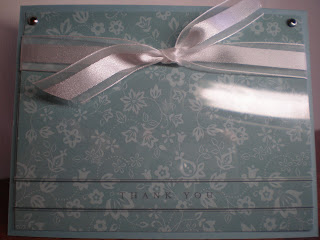


 Now this is another one where it has rub-ons on the transparency sheet. I love what a clean look it is! (You can see the reflection of the light on the transparency) And the 2 little love birds are awful cute too (Lynsay's maiden name was bird....perfect! :)) The grommets are super fun, and I love the look - REAL hard to get through the cardstock and the transparency!!