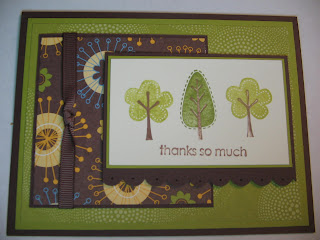
Showing posts with label Thank You. Show all posts

Sunday, January 23, 2011

Snowman Thank-you

I am back! My room is officially back together and organized! Feels great to have my space back. Let's bring on the creativity!

We made these super adorable snowmen at Stamp Club this month (I am just getting around to posting...). If you still have thank-you's to send out for holiday gifts, these are it! It is okay to admit you still have thank-you's to get out in the mail...I just sent all mine Saturday.

To construct the snowman, I used the Top Note Die to make his hat and face and his rosy cheeks are made with a sponge dauber. Googly eyes make him super adorable! Who wouldn't love to receive this in the mail as a thank you gift? Or for any reason, for that matter! Happy winter!

Recipe:
Stamp: Teeny Tiny Wishes
Paper: Bashful Blue, Old Olive DSP, Whisper White, Pumpkin Pie
Ink: Chocolate Chip (for sponging around the hat), Pink Pirouette
Acessories: Googly eyes (Hobby Lobby), Rhinestone Brad, Spong Dauber, Top Note Die, Big Shot, Snowflake embosslits, Dimentionals, Corner Rounder

Saturday, March 20, 2010

Textured Thanks

This embossing folder is so great! It can be used on any card, for any reason! And I sure do love how it adds so much character to a white piece of card stock! A package of these cards tied up with a bow would make such a great gift for someone!

Recipe:
Stamp Set: Very Thankful
Ink: Cameo Coral
Paper: Cameo Coral, Whisper White, So Saffron
Accessories: So Saffron, Dimensionals, Big Shot, Perfect Polka Dots Embossing Folder

Tuesday, February 16, 2010

February Stamp Club

Back from vacation and back to stamping. And it's time for stamp club again!

This first card is a thank you card "note card" style. It gives you enough room to write a quick note to someone on just a card front. Easy way to create a bunch of thank you cards to have on hand! With a little 3-d flower in the corner by punch circles and then crinkling them up!


Recipe:
Stamp Set: Family Phrases
Paper: More Mustard, Old Olive, Welcome Neighbor DSP, Sweet Pea DSP
Ink: Melon Mambo
Accessories: Dimensionals, Earth Elements Brad (More Mustard),
Chocolate Chip Ribbon, 1 3/8" Circle Punch, 1 1/4" Circle Punch,
1" Circle punch, 1/2" Circle Punch

Now, punch art has been all over the place, and is SOOO fun to create little critters out of your punches! This super cute little sheep reminds me of spring and of Easter. He is sitting on a corner bookmark, which would make a great gift for a reader in your life!

Recipe:
Ink: Basic Black (for sponging)
Paper: Sweet Pea DSP, Whisper White, Basic Black
Accessories: 1 3/8" Circle Punch, Scallop Circle Punch, Trio Flowers Punch,
Word Window Punch, Large Oval Punch, 1/2" Circle Punch, booglie eyes

This last one is a great little 'welcome to the neighborhood' gift! Fill it with cookies, candies, or some other kind of snack mix for someone new to the neighborhood! I loved getting those kinds of gifts when we moved!

Recipe:
Stamp Set: Sweet Season
Ink: Old Olive
Paper: Melon Mambo, Crushed Curry, Whisper White, Welcome Neighbor DSP
Accessories: Gift Bag (from Hobby Lobby), Wide Oval Punch, Dimensionals, Silver Brad, 3 flower punch, Silver Cord, Crushed Curry Ribbon, Horizontal Slit Punch


See you tomorrow!

Sunday, January 17, 2010

Another Christmas Thank you

And here is another great thank you card. Need a way to use up some of your designer paper scraps? A 1 1/4" square punch has been one of my best investments. GREAT way to use up your leftovers - whatever the holiday!!

Recipe:
Stamp Set: Wonderful Words (retired)
Ink: Chocolate Chip
Paper: Real Red, Chocolate Chip, Very Vanilla, Merry Moments DSP
Accessories: Chocolate Chip Ribbon, Dimensionals

Friday, January 15, 2010

Christmas Thank you

Well it is about time I get some thank you cards out for Christmas. So if you are expecting one from me - they are on their way! This card reminds me of a package, and this paper is just yummy. And why not adhere your ribbon with a staple? A different change of pace!

Recipe:
Stamp Set: Family Phrases
Ink: Chocolate Chip
Paper: Very Vanilla, Merry Moments DSP, Real Red
Accessories: Chocolate Chip Ribbon, 1 1/4" Circle Punch, 1 3/8" Circle Punch, Dimensionals

Wednesday, January 13, 2010

January Club

I know, I've been MIA. But back just in time for Valentine's Day! Now, Duane may not think Valentine's Day is the best invention in the world, but I love pink and red and think all things Valentine's are awesome!

This first card is super fun, and a great way to display your card! It is called the Easel card, and the directions can be found here.


Recipe
Stamp Set: Love you Much, Teeny Tiny Wishes, Love You Much
Ink: Chocolate Chip
Paper: Chocolate Chip, Pretty in Pink, Real Red, Very Vanilla, Sending Love Specialty DSP
Accessories: Dimensionals, Chocolate Chip Button, Pretty in Pink Ribbon

You can't have Valentine's Day without a little sugar ;) Here is a super easy little candy holder.

And the cinnamon candy hearts that are in the inside.

Recipe:
Stamp Set: Love you Much
Ink: Real Red
Paper: Sending Love Specialty DSP, Very Vanilla
Accessories: Heart Punch, Small Cello bag, Pretty in Pink Ribbon, Circle Brad


And this last creation uses great DSP and stamp set from the new Sale-a-Bration catalog. For each $50 you spend from now through the end of March you can choose a free stamp set!!!

Recipe:
Stamp Set: Happy moments
Ink: Going Gray
Paper: Bermuda Bay, Pumpkin Pie, Whisper White, Sweet Pea DSP
Accessories: Word Window Punch, Designer Label Punch, Silver Brads, Bermuda Bay Ribbon, Dimensionals, Assorted Clips
See ya tonight!

Wednesday, December 9, 2009

December Club

Can you believe its time for December Stamp Club? One last chance to get ready for Christmas! :) Are you ready?

First card is a 'winter' card for those of you who aren't doing Chrismtas cards and doing a holiday or winter card instead ;) This card has lots of texture and is super fun, I think. Run the white through the Big Shot and the red through the crimper!


Recipe:
Stamp Set: The More the Merrier
Ink: Brilliant Blue
Paper: Bashful Blue, Real Red, Whisper White
Accessories: Real Red Polka dot ribbon, gold cord, Dimensionals, Crimper, Big Shot Daisy Embossing folder

After all your Christmas cards are done, I bet you will be in great need of some thank you's! I know I always am. This is a super fun Buckle Card. You can find the tutorial here at Splitcoast. And I used my favorite sentiment stamp set, Teeny Tiny Wishes. Do you have that stamp set yet? It literally has a stamp for every occasion!!

Recipe:
Stamp Set: Teeny Tiny Wishes
Ink: Chocolate Chip
Paper: Real Red, Chocolate Chip, Whipser White, Christmas Cocoa DSP
Accessories: Word Window Punch, Brad, Big Shot Snowflake die, Dazzline Diamonds glitter

Okay, I think this is my most favorite project ever!!!! And the cutest way to dress up a candy bar. Wouldn't these look adorable on top of a package? Or in someone's stocking? I already have 2 little kiddos in Belgrade in mind for mine!!


Recipe:
Paper: Chocolate chip, Real Red, Close to Cocoa
Accessories: Real Red Ribbon, Pipe cleaners, 1/2" circle punch, 1" circle punch, 1 1/4" circle punch, 1 3/8" circle punch, scallop circle punch
See ya tonight! I better have some hot cocoa and cider on - its gonna be chilly!

Monday, October 19, 2009

Double the thank-yous

These are the thank-you cards I made for Lyns to go in the gift bag you saw on Saturday. She requested that I make her thank-you's for her shower gift, as she will have lots of thank-yous to mail out!!!

I made her a set of pink and a set of blue in honor of her baby girl and baby boy!! This is a great way to make a simple, yet stunning card with all that DSP that you are hoarding. (I do it too, its okay to admit it).

Recipe:
Stamp Set: Family Phrases
Ink: Versamark
Paper: Pink Pirouette (retired), Pink Pirouette DSP (retired), Whisper White
Accessories: White Emobossing Powder, Dimensionals, Small oval Punch, Scallop Oval Punch

The 'boy' thank you is the same except the sentiment is a little different.


Recipe:
Stamp Set: Cute and Curly (Retire)
Ink: Versamark
Paper: Soft Sky (retired), Soft Sky DSP (retired), Whisper White
Accessories: Curly Label Punch, Dimensionals, White Embossing Powder, Silver Brad

Hope she enjoys her thank you's. Congrats Lyns! Your babies are beautiful!!!

Thursday, September 24, 2009

Falling Leaves Thank you

This is such a great stamp set, and so perfect for fall. I also think that these 3 In-colors are perfect for fall. There is nothing that I don't love about fall. The colors, the smells, the changing of the season. Yummy! These are thank you notes to my dear friends and family for birthday gifts.

I love how this card turned out, although it was a little time intensive to make 8 of! First take your piece of Vanilla cardstock and randomly stamp your image, then cut into a grid, sponge and adhere to your next piece of card stock. What a great fall look!

Recipe:
Stamp Set: Falling Leaves, Trendy Trees
Ink: Crushed Curry, Dusty Durango, Soft Suede
Paper: Soft Suede, Dusty Durango, Very Vanilla
Accessories: Oval Punch, Large Oval Punch, Crushed Curry Ribbon, Jumbo Eyelet
Technique: Sponging

Tuesday, September 1, 2009

Thank you!

I had a great surprise one night last week! A super great family in my (new) neighborhood stopped by with a plate of brownies to welcome us! I know this is such an 'old school' thing to do, but so is sending out thank-you cards, and I am a believer in that as well! The family that brought me brownies just happens to be relatives of mine (sort of . . .) and that makes it more special. Here are the brownies. Yes, notice a few were gone by the time I took the picture. They were delish! Thanks to the Recks!

Of course, in return for home-made goodies, I made a hand-made card. The two kids in the family are little girls, and I thought the pink and the lamb were perfect!

Here is an upclose shot of the lamb. He is (of course) fluffed up with Liquid Applique and his heart is covered in Crystal Effects. If you don't have this stamp set yet, you simply must get it! The sayings are so adorable and the little critters are just so cute!

Recipe:
Stamp Set: Pun Fun
Ink: Regal Rose, Going Gray, Blush Blossom
Paper: Regal Rose, Certainly Celery, Whisper White, Sweet Always DSP (retired)
Accessories: Dimensionals, Crystal Effects, Liquid Applique, Certainly Celery Ribbon (retired),
Big Shot Top Note Die
Technique: Sponging, Heat gun (for the Liquid Applique)

Friday, August 28, 2009

Give Thanks

This is a thank you card for a dear, dear friend of mine. She is a master sewer (even without a pattern) and for Christmas she made me some wonderful things. Christmas, you say? Well, she has 2 little ones at home, and sometimes projects take longer than they are supposed to. Hey - that happens at my house, and I don't even have little ones.

Anyway, I wanted to make her a fun thank you card, and I hope this fits the bill. I used retired autumn paper from last year, but used a new stamp set from the new catalog, the More the Merrier, which is super fun!

You may notice that the sentiment seems 'suspended' in the card front, and it is! To get this look is easy. Stamp your image twice, and adhere them together with a piece of string in the middle. You can use dental floss, but I used some crochet string that I have oodles of. The string then gets put in between your layers that will make up your card front. Punch a shape slightly larger than your sentiment image so that it remains suspended. I had to use the 1 3/8" inch circle punch for my sentiment and the only thing I had larger was the scallop punch so it works!

These would be easy to mass produce for fun thank yous . . . Thanks again Lyns for the great gift! I use it almost every day. If I cook, that is . . .


Recipe:
Stamp Set: The More the Merrier
Ink: Chocolate Chip, More Mustard, Really Rust
Paper: Whisper White, Really Rust, More Mustard, Autumn Vine DSP (retired)
Accessories: Chocolate Chip Ribbon, 1 3//8" Circle Punch, Scallop Circle Punch, Crochet Thread

Posted by Picasa

Thursday, July 30, 2009

Thank you!

She really loves her . . . 1 1/4" punch! Do you ever see that in the magazines and they show a celebrity in a bunch of pictures with the same scarf or purse, or whatever? Well, I am on a kick with this punch, and it is SOO fun! A great way to add dimension to a card, and an easy way to use up a bunch of scraps of paper, whether it is cardstock or designer paper. So here is a card that does just that - uses up those itty bitty scraps of cardstock that you just can't bear to throw away. I also used some (non-SU!) brads that were in my stash that matched perfectly to SU! colors!!!


Recipe:
Stamp set:
Teeny Tiny Wishes, Simply Said
Ink: Basic Gray
Paper: Confetti White, Green Galore, Pink Passion, Tempting Turquoise
Accessories: 1 1/4" Square Punch, (non-SU!) brads, dimensionals
Technique: Sponging

And this is the second card I did with a little bit different color combination. Which one do you like best? I needed a handful of thank-yous for those dear friends that have given us house-warming gifts! These worked great! Each square is 'up on blocks' to give it added dimension and also sponged around the edges! :) The sentiment is from a fantastic stamp set in the new catalog called Teeny Tiny Wishes. If you are looking for a stamp set with all the phrases that you would EVER need, this is the one!!!


Recipe:
Stamp set: Teeny Tiny Wishes, Simply Said
Ink: Basic Gray
Paper: Confetti White, Summer Sun, Cameo Coral, Lovely Lilac
Accessories: 1 1/4" Square Punch, (non-SU!) brads, dimensionals
Technique: Sponging

Hope you like! They sure were fun to make!

Wednesday, June 10, 2009

June Club

It is that time again! Time for monthly stamp club! And if everything goes well, this will be the last club in our old house! Although we have been saying that for awhile now....anyway!

This first card is an adorable 3x3 thank you card. So nice to have a stack of these on hand when you need to send some thanks! Or....how about making a little box of them and giving them as a thank you gift?!? Do you have the Eight Great Greetings set yet? It is SOO versatile!

Recipe:
Stamp Set: Eight Great Greetings
Ink: Old Olive
Paper: Chocolate Chip, Very Vanilla, Old Olive
Accessories: Dimensionals, Chocolate Chip Ribbon, Clips Assortment

This next card just tickles me! Who would have thought that my favorite Big Shot die turns into a purse when folded?! OMG! I just love it! What a great card to make for a girlfriend, a sister, or anyone who likes handbags. And who doesn't love handbags?

This purse is made from the fantastic textured Parisian Breeze DSP. It is double sided designer paper, but it is also thick like cardstock! Such nice quality! The closure for the purse is a Build a Brad which is so cool cuz you can make your brad fit your project! Add any sentiment you want to the inside!


Recipe:
Paper: Baja Breeze, Chocolate Chip, Kraft, Parisian Breeze DSP
Accessories: Build a Brad, Dimensionals, Chocolate Chip Ribbon, Big Shot, Top Note Die


Okay, I saved the best for last (I think). I bought this die a few months ago, and just broke her out of the packaging right before we left town. I thought this would be a SUPER cute card to make for club. Wedding season is around the corner, any of you have weddings you need to attend? Wouldn't you love to have a few of these on hand?

This is the outside of the card. There is a piece of Pink Pirouette with the organza ribbon that runs around the entire card as the belly band to keep the card closed. The wedding cake is adhered to the belly band. The wedding cake is embossed with white embossing powder. Why do you need to hold the card together, you ask?


Here is a picture of the card 'mid-open'

And here is a picture of the card fully opened. Its hard to tell from the picture, but can you see the little bride and groom at the top of the cake? SOO awesome! This is such a fun die to use! The Congratulations sentiment is embossed in silver!


Now this card can be a little time intensive, but I think it is totally worth it. What do you think?

Recipe:
Stamp Set:
For the Bride
Ink: Versamark
Paper: Whisper White, Pink Pirouette, Pink Pirouette DSP, Silver
Accessories: Big Shot, 3 tier 3-d cake die, White Organza ribbon, Dimensionals, White Embossing Powder, Silver Embossing Powder
Technique: Embossing

Tuesday, March 3, 2009

Peek-a-boo Thank you!

So I had seen a peek-a-boo card, and just knew that I had to make one! They are so cute, and so easy, and you could use any sentiment really! On this one I used the Sale-a-bration Delicate Dots paper and Sale-a-bration Ribbon (sale goes through March if you are eye-balling something you want!).

Quick lesson: Adhere your designer paper to your cardstock, and then punch through both layers with your larger circle punch (here I used 1 3/8" circle). On a contrasting piece of cardstock, punch your larger circle, and then position your scallop circle around the outside to get the 'frame' to go on the outside of your card. Then make your peek-a-boo part, and be VERY careful adhering it to the inside! Cuz once it's stuck.....it doesn't usually come off again!


Here is the peek inside!


Hope you like the peek-a-boo card, I know that I am going to make many more!!

Recipe:
Stamp Set:
Family Phrases
Ink: Basic Black
Cardstock: Bashful Blue, Certainly Celery, So Saffron
Accessories: So Saffron Ribbon (SAB), Delicate Dots Designer Paper (SAB), Paper Piercer, Scallop Circle Punch, 1 3/8" Circle Punch, 1 1/4" Circle Punch

Monday, February 16, 2009

Trendy Trees

Okay, so when the new catalog came out, this was my most favorite stamp set, and was the first to go on my wish list! Can you believe that it took me this long to actually use it?! Eek! And to think I had a 3 day weekend, and the first time I got to sit down and stamp was tonight! Lots of cleaning and preparing for the new house!

Now, this set was not initially easy to work with, even though I wanted it to be. But - It did work out in the end. This is a stamp set that having a Stamp-a-ma-jig is a must. Otherwise, there is no way you will be able to line up the trees and the trunks. So, once you get the hang of it, the trees come pretty easy! The designer paper is the Good Morning Sunshine which I just love! The colors are great!


I love to use the sewing machine on cards - adds a little extra something!!

Card Recipe:
Stamp Set: Trendy Trees
Ink: Summer Sun, Chocolate Chip, Kiwi Kiss
Cardstock: Kiwi Kiss, Summer Sun, Chocolate Chip, Whisper White
Accessories: Dimensionals, Chocolate Chip Ribbon, Corner Rounder Punch, Good Morning Sunshine Designer Paper
Techniques: Sewing machine, Stamp-a-ma-jig

Card Recipe:
Stamp Set: Trendy Trees
Ink: Kiwi Kiss, Old Olive, Chocolate Chip
Cardstock: Chocolate Chip, Kiwi Kiss, Very Vanilla
Accessories: Paper Piercer, Chocolate Chip Ribbon, Scallop Edge Punch, Good Morning Sunshine Designer Paper
Technique: Paper Piercing, Stamp-a-ma-jig

Thanks for coming by!

Tuesday, February 3, 2009

Goody-Goody Gumdrops

Okay, everyone knows how much I love sugar, right? Well, when I saw the title of this stamp set, I knew I had to have it! They all don't have something to do with sugar, but I think this stamp set sure is yummy!!! The more I use this stamp set, the more I love it! It is a Level 3 hostess set.

This first card is the most sugar-laden card of all! The sundae looks just delish and is jazzed up with a little Dazzling Diamonds Glitter and Red Chunky Essentials Glitter. The (retired) Summer Picnic Designer Paper goes so well with the cherries! Doesn't it make you want to have a sundae??
Card Recipe:
Stamp Set:
Goody-Goody Gumdrops
Ink: Basic Black, Bashful Blue, Real Red
Cardstock: Old Olive, Real Red, Whisper White, Bashful Blue
Accessories: Dimensionals, Dazzling Diamonds Glitter, Red Chunky Essentials Glitter, 1/4" Real Red Grossgrain Ribbon, Ticket Corner Punch

The next card is a cute little non-gender baby card. The little duckies are just adorable, and when they are all lined up in a row like that, they are even cuter! How did I get them lined up, you ask? Well, my new favorite tool in the whole world - the Stamp-a-ma-jig. It allows you to line up your image just where you want it! No more crooked images or sentiments! It is a MUST have - trust me! The beaks have a little Crystal Effects to make them shiny!

Card Recipe:
Stamp Set:
Goody-Goody Gumdrops
Ink: So Saffron, Close to Cocoa, Chocolate Chip, Pumpkin Pie
Cardstock: So Saffron, Kraft, Whisper White
Accessories: Certainly Celery Ribbon (SAB), Delicate Dots Designer Paper (SAB), Dimensionals, Crystal Effects
Technique: Stamp-a-ma-jig

The next one is a great little wedding card - I just love to use the Baja Breeze in a wedding card - so fresh! And how could I resist not using the Dazzling Diamonds Glitter on the bells?

Card Recipe:
Stamp Set:
Goody-Goody Gumdrops, Congrats (SAB)
Ink: Close to Cocoa, Baja Breeze
Cardstock: Close to Cocoa, Baja Breeze, Whisper White
Accessories: Baja Breeze Designer Paper, Baja Breeze Ribbon, Heart to Heart to Punch, Dimensionals, Dazzling Diamonds Glitter


I hardly ever use purple, but knew that purple would be perfect for this easy little thank-you card, especially since I got to use Orchid Fine Cosmo Glitter!


Card Recipe:
Stamp Set: Goody-Goody Gumdrops
Ink: Basic Black, Lovely Lilac, Certainly Celery
Cardstock: Almost Amethyst, Lovely Lilac, Whisper White
Accessories: Almost Amethyst Designer Paper, Orchid Fine Cosmo Glitter, Dimensionals


Alright, the last card. It was the first one I made, and wasn't sure that I was crazy about the owl, but now that the card is done, I think he is SUPER cute! Especially with his big glassy eyes that I touched up with Crystal Effects!

Card Recipe:
Stamp Set:
Goody-Goody Gumdrops
Ink: Chocolate Chip, More Mustard, Really Rust, Barely Banana
Cardstock: More Mustard, Really Rust, Chocolate Chip, Very Vanilla
Accessories: Autum Vine Designer Paper (retired), 5/8" Chocolate Chip Grossgrain Ribbon, Dimensionals, Crystal Effects, Antique Brass Jumbo Eyelet

PHEW! That is it for tonight! Can you tell I was home alone last night while Duane worked up at the house?! I also have a little secret to tell you - I love the Stamp-a-ma-jig so much that I used it on all the cards so everything was all lined up straight! I am happy to show you how to use it!

Tiff

Wednesday, January 28, 2009

Wonderful Words

Well, Wonderful Words has many wonderful sayings -- thank you, celebrate, friendship and love. The 4 of these are fairly generic, and even though this set retired, I just couldn't bare to part with it, or stop using it! It was one of my very first 'word' sets, and I continue to love it!

These cards are the same but with different sentiments. I am thinking this is a fantastic layout, and can't wait to try it in different colors!


Here is the second card:

If you look closely, you will see that I have used a new technique, but one that I totally LOVE! My sewing machine! At first it seemed a little strange sewing on paper, but is really no different than sewing on fabric. I think the outcome is fantastic! I alternated with yellow thread on the Not Quite Navy cardstock, and the navy thread on the So Saffron Cardstock.

You will notice that the flower stamps in the background are from the Simply Said stamp set, another favorite of mine!

Hope you enjoy!

Card Recipe:
Stamp Set: Wonderful Words (Retired), Simply Said
Ink: Not Quite Navy, Versamark
Cardstock: So Saffron, Not Quite Navy, Whisper White
Accessories: Not Quite Navy Designer Paper (Hostess Pack), Silver Brad, Sewing machine, (non-SU!) flower
Technique: Tearing, Sewing

Saturday, January 24, 2009

Stamp Club Thank-you's

I have some great gals in my stamping club, and wanted to show them how much I appreciate them. What better way to show them then with a handmade card?!

Here is the card I made with one of my most favorite
stamp sets, Simply Said. It is such a versatile set and actually has quite a few stamps in it that coordinate well with each other to do the 2-step method. I used the 2-step method on this card with the flowers.

The base of the card is Kiwi Kiss with a piece of Whisper White on top of it. I used the in colors: Kiwi Kiss, Pacific Point, Riding Hood Red and Tangerine Tango as the flowers. The sentiment is stamped on Whisper White with a piece of Pacific Point Ribbon running underneath it.

The sentiment is perfect for the occasion - as these club girls really are great, and make stamping so much more fun! I hope they like the card as much as I do, and know how special they are to me!


Recipe:
Stamp Set: Simply Said
Ink: Tangerine Tango, Pacific Point, Riding Hood Red, Kiwi Kiss, Basic Black
Paper: Kiwi Kiss, Whisper White, Tangerine Tango
Accessories: Pacific Point Ribbon, Dimensionals


And now onto the gift. I couldn't resist making them each a little set of monogrammed notecards. The little 3x3 notecards are the perfect size for a little handwritten note, and with it being monogrammed, it adds such a personal touch. The card I am showing to you I made with the initial "T" for Tiffany, but the cards that I made for the girls have the initial for their last name on the card.


These are the cards. They are 3x3, and I used the Illuminated Wheel and Versamark to give a watermark to the card and add a little interest.

The monogrammed letters are from the Lovely Letters stamp set which I just fell in love with when I saw it for the first time. A few layers of circles on top of the scallop, and they are together. I put the monogram up on blocks and on top of Old Olive Ribbon.

In addition to the cards, I also made a little 'sleeve' to put them in. This, I think, makes them more into a gift and a cute little pocket to slip inside a card.


To make the base of the pocket, I traced a 6 inch plate onto a piece of Old Olive cardstock, and then cut it out with scissors. I am sure there are other easier wayts to cut out the circle, such as the Coluzzle, or the new circle cutting system that SU! has in the new catalog.

I again used the Versamark and the Illuminated Wheel to add some dimension to the pocket. I scored the pocket at 1 3/4" for the bottom, and then 1 1/4" for each of the sides. I used my bone folder to make sure that there was a nice crease. The belly band uses the Ski Slope Designer Paper, which really isn't in season anymore, but I think has great color combinations. The belly band measures 1" by 7 1/4". I adheared to the back, and then wrapped a piece of Chocolate Chip Grossgrain Ribbon around to tie it all together. Just make sure that you insert the cards and envelopes inside the pocket card before you attach the bellyband to make sure there is enough room in there!
Hope the girls like the presents, and I hope you love the Lovely Letters stamp set as much as I do!

Recipe:
Stamp Set: Lovely Letters, Illuminated Wheel
Ink: Chocolate Chip, Versamark
Paper: Old Olive, Chocolate Chip, Real Red, Baja Breeze, Ski Slope Designer Paper
Accessories: Dimensionals, Chocolate Chip Ribbon, 1 1/4" Circle Punch, 1 3/8" Circle Punch, Scallop Circle Punch

Thanks for stopping by! Let me know if you are intersted in joining my stamp club, or if you want to place an order!
Tiff